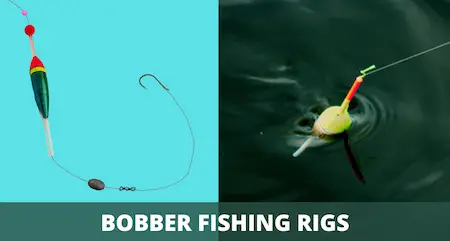
5 Types Of Bobber Fishing Rigs (That Will Catch Fish Anywhere)
PUBLISHED 03 NOVEMBER 2023
by Robert Ceran
Are you planning to do some bobber fishing, but not sure which rig is best for you?
In order to leverage the full potential of bobber fishing to put more fish in your boat, it’s essential to choose the right bobber rig for your purposes.
In this article we’ll show you through 5 most important bobber fishing rigs, and will cover how to tie them, how to fish them, and how to choose the best setup for different applications.
What are the different types of bobber fishing rigs?
The 5 most commonly used bobber fishing rigs are:
- Slip bobber rig
- Fixed bobber rig
- Float & fly rig
- Popping cork rig
- Bobber doggin rig
We’ll cover the strengths and weaknesses of each of these bobber fishing setups in full detail, so you can decide which one is best for you.
We’ll also teach you how to set them up, and how to fish them for maximum effect. Read on for the full scoop below.
Slip bobber rig
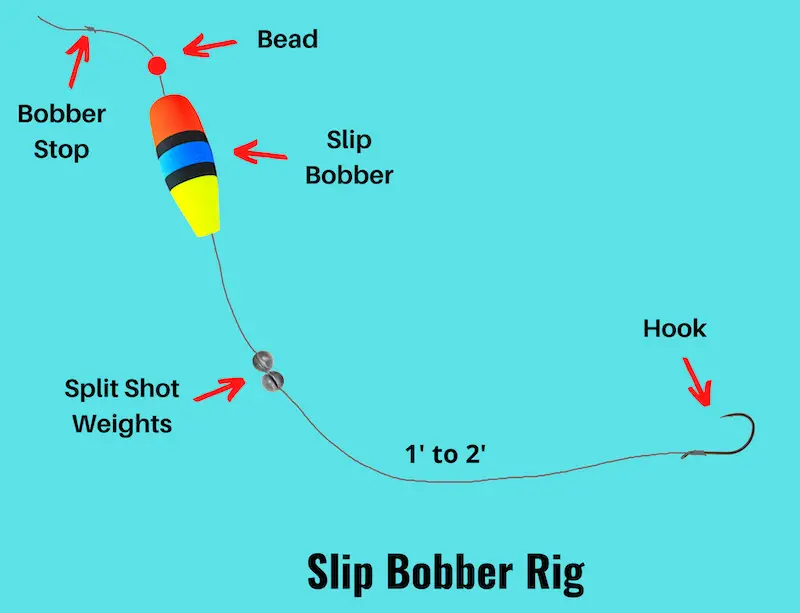
This is by far the most versatile fishing rig for freshwater, as you can use it to catch almost every freshwater fish species there is, including bass, walleye, catfish, and panfish.
And if you’re into inshore fishing, this setup also comes in handy for several saltwater species, such as red drum and speckled trout.
How to set it up: First, secure a bobber stop to your line. While you can tie this knot yourself, recommend using ready-made stops, which are cheap and work like a charm. Then, thread a plastic bead onto the line (which will prevent the stopper from getting stuck inside the bobber), followed by the slip bobber itself. Finally, add one or more split shot weights beneath the bobber (which will prevent it from sliding onto the hook), and end with tying on your hook.
How to use it: You can use this rig with pretty much any kind of bait, either natural or artificial. It’s often used with live bait, or with cured baits, such as powerbait or salmon eggs. A popular tactic is to use the slip bobber fishing rig with a live minnow on a small octopus hook, which works for catching a wide variety of species, including \walleye, bass, trout, and crappie.
When to use it: A sliding float setup is ideal for fishing water that’s deeper than about 6 feet, as it’s not practical to use a fixed bobber rig in water that’s deeper than the length of your rod.
However, if you’re using a slip float to target fish suspended in deeper water, it’s usually best to use a fish finder to narrow down the depth range to target. Lacking a fish finder, you can try to systematically scan a range of different depths by adjusting the bobber stop on your slip float rig, until you get bites.
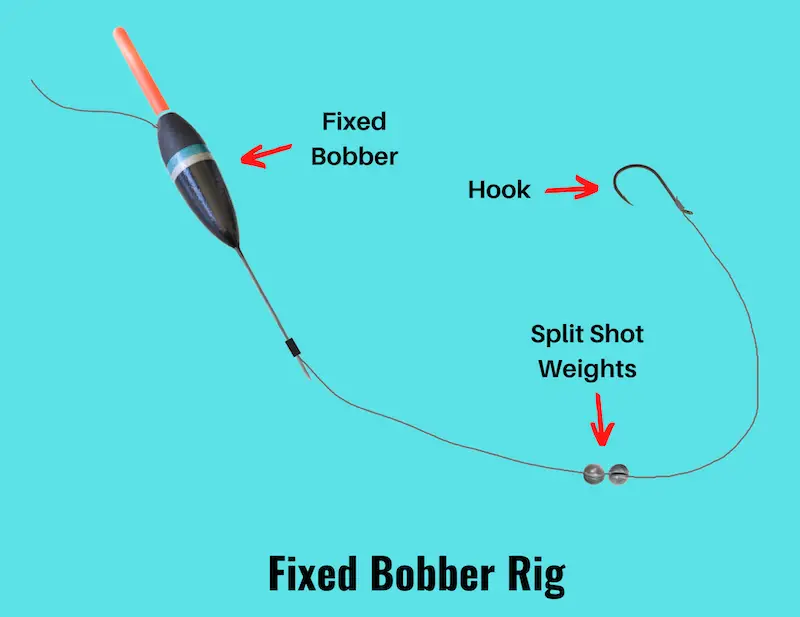
Fixed bobber rig
This is one of the easiest fishing rigs to set up and fish with, and many anglers get their first fishing experience with this rig. I remember when my dad took me fishing for the first time, and I used a fixed bobber setup and a hook baited with maggots to catch bluegill in the shallows.
How to tie it: It’s incredibly easy to set up this rig. The first step is to attach the float to your fishing line. As shown in the image above, there are usually two rubber rings that can be pulled off the bottom as well as the top of the bobber.
After threading the fishing line through each of these rings, you just have to push them back on to the bobber, and this fixes the bobber to the line (although it’s still possible to move a fixed float slowly up and down your fishing line).
Finally, tie the line emerging from the bottom of the bobber to a hook, add a few split shot sinkers between the bobber and the hook, and you’re good to go!
How to use it: Add bait to the hook, and cast the rig to spots where fish are likely to be feeding (such as feeding lanes in streams or the edges of reed beds in lakes). If you’re not sure at what depth the fish are feeding, you can test this by sliding your bobber to different depths, until you start to get fish bites.
When to use it: The fixed bobber rig shines when fishing in shallow waters less than 5 feet deep, such as near lake shores or in shallow streams. This is my go to setup of trout and panfish. Keep in mind that you can easily adjust the depth setting of this rig to explore a variety of depths in order to find the fish.
Float and fly rig
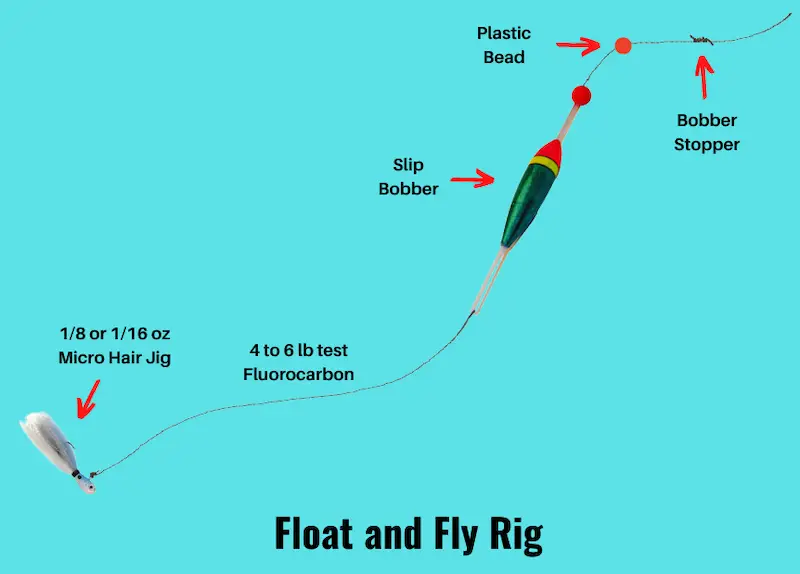
This is a finesse rig that was originally developed for crappie fishing, but was later adopted for trout fishing because it’s so effective. It also works well for sluggish bass in cold water.
How to tie it: This rig can be set up with either a slip bobber or fixed bobber, and doesn’t require extra weights or split shots, since you use this rig with a jig or weighted jig hook, which is heavy enough to sink down in the water column on its own.
Start by threading the bobber onto your line, and if you’re using fluorocarbon as your main line, you can proceed directly to tying the end of the line to a micro jig or tungsten jig. However, if you’re using braid as your main line, thread the float onto the braid, then attach a swivel to the end of the main line, and finally tie a fluorocarbon leader to the other eye of the swivel.
How to use it: This setup is ideal for targeting suspended fish, and due to its finesse qualities, is extremely effective for panfish, trout, and finicky bass in cold water. If you’re using a slip bobber to target fish that are suspended in deep water, it’s usually best to use a fish finder to narrow down the depth range that you need to target.
Since this is a finesse rig, in my experience you don’t need to impart a lot of movement to the jig suspended under your bobber, as small movements are often enough to trigger bites. So try to retrieve the rig slowly, interspersed with regular pauses to allow the jig to sink down below the float. I’ve found that I most often get a bite when the jig sinks down in the water.
When to use it: The float and fly setup is perfect for targeting crappie, panfish and trout in water up to 20 feet, as well as sluggish largemouth bass in fall and early winter. It’s also ideal for targeting fish that are suspended over weeds or other cover.
Popping cork rig
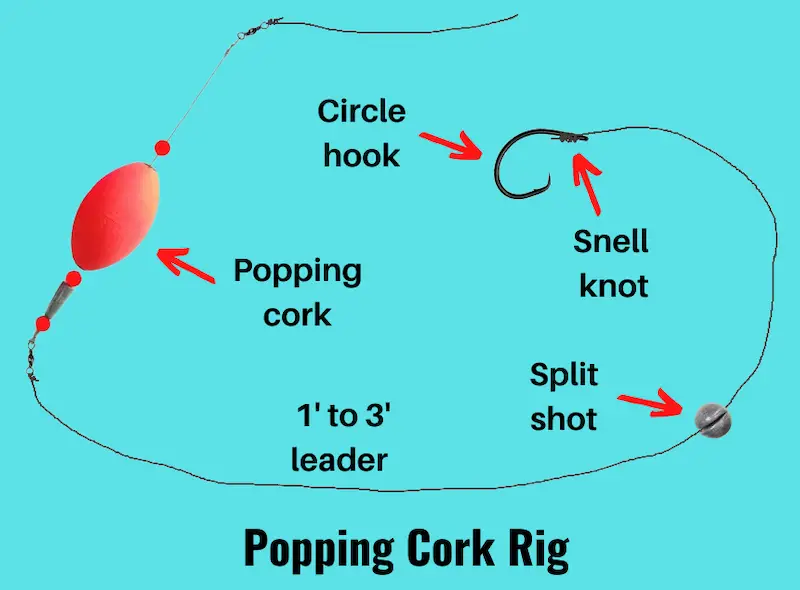
The popping cork rig is a great setup for inshore fishing in shallow water under 5 feet depth, and is most often used for redfish and speckled trout in creeks and around shellfish beds.
How to tie it: The first step is to tie the end of the leader line to your hook, which you can do with a uni knot or a snell knot. Next, set the leader length to between 1 and 4 feet, depending on the depth of water you’ll be fishing in.
Ideally, you’ll want your bait to be presented between 5 inches to 1 foot off the bottom, so choose your leader length accordingly. Add one or more split shot weights to the leader a few inches above the hook, to ensure your bait will be suspended close to the bottom.
Then tie the bottom swivel of your popping cork to the other end of the leader line. If you’re not sure which end of the cork to use, pick the one with a weight on it. In the last step, tie the main line to the other end of the popping cork, and you’re good to start fishing.
How to use it: Bait the hook and cast your popping cork rig to a promising location. The best spots are often drop offs close to shore, as found next to the edges of creeks or in creek mouths. This setup also shines when targeting redfish feeding in or around shellfish beds.
When to use it: The popping cork rig is perfect for catching redfish in shallow inshore waters, including seagrass flats, creeks, mussel beds, and oyster beds. These spots are often hard to fish with other rigs, but attract plenty of redfish action, which makes the popping cork rig such a powerful weapon for shallow water redfish.
Bobber doggin rig
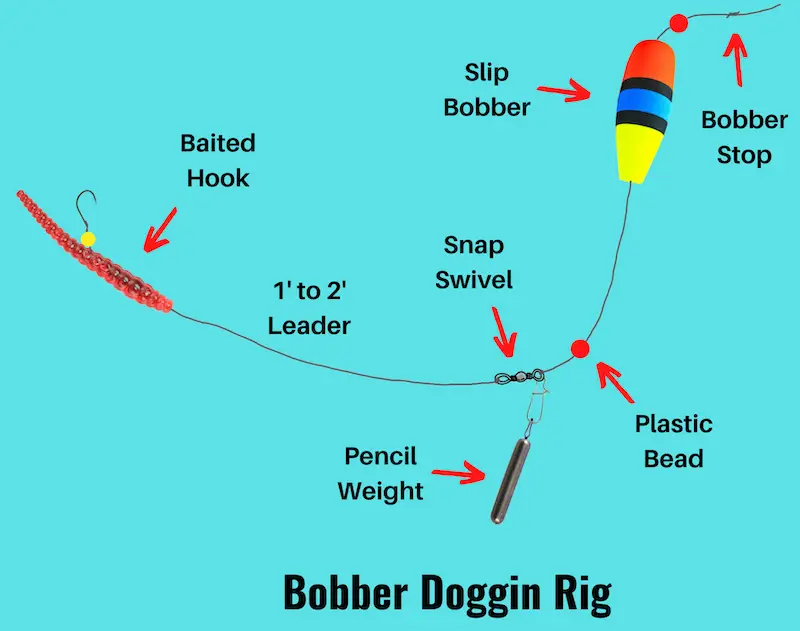
The bobber doggin rig is unusual in that it combines features of both a bottom fishing rig and bobber fishing rig in a single setup. It is most often used for steelhead and salmon fishing in rivers with a relatively strong current.
How to tie it: Setting up a bobber doggin rig is a little more complicated than the other bobber fishing rigs covered in this article, but is definitely worth the effort if you’re planning to target steelhead or salmon.
The top half of this setup is broadly similar to a slip bobber rig as described above. However, the bottom half is different, starting with a plastic bead that is threaded onto the line underneath the slip float. Next, you need to tie your main line to a snap swivel (making sure to tie the line to the eye that has the snap on it), and attach a pencil weight to the snap.
In the final step, you tie a fluoro or mono leader to the second eye of the snap swivel, and then a bait hook to the end of the leader.
When to use it: This setup is perfect for drift fishing in medium to heavy current, which you can do either from a boat, or from the bank of a river. The design of this setup ensures that your bait is dragged across the bottom of the river, which is the prime strike zone of steelhead and river salmon.
The current pulls the bobber downstream, which automatically drags the pencil weight across the bottom together with your baited hook.
How to use it: First set the depth of your sliding bobber to about 1.5X the depth of the river you want to fish in. This is essential if you want the current to drag the setup downstream with the weight on the bottom.
Ideally, you should be able to see your bobber leaning downstream as the current pulls it along while dragging the weight along the bottom. So if you notice your bobber standing up straight in the water, that means it’s set too shallow, and you need to add some more depth.
What is the best bobber rig?
Without a doubt, the slip bobber rig is the best all round setup for bobber fishing, due to its incredible versatility.
You can use it to target a wide range of depths, from 2 feet to more than 50 feet, and it’s easy to adjust the depth simply by sliding the bobber stop up or down your fishing line.
In other words, make sure you have this setup in your fishing tackle box when you head out to the water.
With that being said, however, the easiest rig to set up is the fixed bobber rig, which makes it a great option for beginners. I also like to use it for fishing in shallow water, where you don’t need the additional depth provided by a slip bobber rig.
Finally, the other 3 setups covered in this article are each ideally suited for more specific fishing situations and tactics, and will outperform many other setups when used at the right time.