Garmin LiveScope Troubleshooting (Common Problems & Fixes)
UPDATED 03 NOVEMBER 2023
by Robert Ceran
Is your LiveScope not working correctly?
While Garmin LiveScope is undoubtedly one of the most powerful live sonars on the market, even its high end technology can run into problems at times.
But the good news is that most LiveScope problems are fairly simple, and can be easily fixed if you know what to do.
In this article we’ll cover the most common LiveScope issues, and how to troubleshoot them effectively
Garmin LiveScope interference problems
One of the most common problems encountered with Garmin LiveScope is interference.
And while there are several kinds of sonar interference, the most commonly encountered one with LiveScope is caused by sonar returns from a hard bottom that create “ghost images” on the screen.
What does interference look like on LiveScope?
Interference on LiveScope usually looks like a “ghost tree”, and is usually caused by sonar returns from a hard bottom structure in shallow water less than 20 feet deep.
This kind of Garmin LiveScope interference pattern will usually stay at the same distance from your transducer, and thus represents a dead zone on the screen where it can be hard to detect the real objects and fish that are in the water.
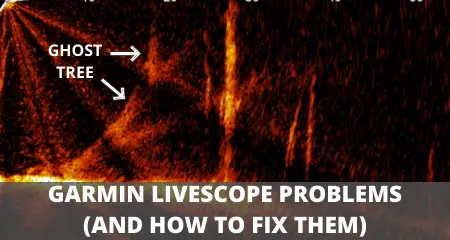
What is the ghost tree on Garmin LiveScope?
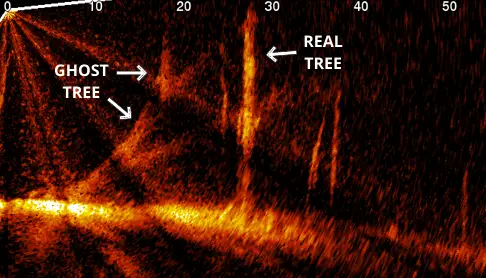
The photo above shows an example of a ghost tree on Garmin LiveScope, This only happens in forward mode, and is caused by interference due to sonar returns from a hard bottom in shallow water.
If you compare the real tree on the right hand side of the photo with the ghost tree on the left hand side, you can see that the ghost tree looks surprisingly similar to the real one.
Keep in mind that while a real tree will move and disappear as your boat moves through the water, the ghost tree will tend to stay in more or less the same location on your screen, which is a good way to diagnose it as a result of interference.
How do you fix the ghost tree on LiveScope?
There are 3 different ways to fix (or at least significantly reduce) the ghost tree on LiveScope.
The first is to increase noise rejection on your device. To do this, click on “Menu” and then on “Sonar Setup.” On the next screen, click on “Noise Reject,” turn it on, and set it to medium.
But keep in mind that if you turn up “Noise Reject” too high, this will also eliminate real signals from the area where the ghost tree used to be located.
Due to this weakness of the Noise Reject functionality, Garmin introduced an update called “Ghost Reject” on the latest generations of LiveScope.
The Ghost Reject functionality redirects some of the sonar beams from going downwards from the LiveScope transducer to going more shallow, which helps to reduce the ghost tree effect without sacrificing real signals.
The third option is to change the angle of your LiveScope transducer to make it slightly more shallow.
This reduces the sonar beams going straight down in the water, and since these are the ones that trigger the returns causing interference, doing this can help to get rid of the ghost tree.
If you want to reduce interference as much as possible on your LiveScope, take a look at our article about reduced interference on Garmin’s new LiveScope Plus.
Garmin LiveScope transducer problems
While LiveScope transducer problems are quite common, they are usually easy to fix.
Transducer problems are most often due to the fact that the transducer signal is relayed via the black box to the head unit, since the LiveScope transducer itself doesn’t connect directly with the head unit.
LiveScope transducer not detected
A common error message that can come up when you turn on the head unit for your LiveScope is the message, “Transducer not connected” or “LiveScope source not found.”
When this happens, it’s most often due to an issue with the black box.
The first thing to check in a case like that is if you set up the black box correctly with its own power source, and that the balck box is plugged into the head unit.
Finally, check if your LiveScope transducer is correctly connected to the black box (it should be plugged into the port labeled “XDCR”).
If all of this looks good, check your balck box to see if there is a blinking red light next to the transducer cable port.
If you see the red light blinking next to the transducer cable port of the black box, just unplug the transducer cable, wait a few seconds, and then plug it back in again.
In most cases, doing this results in the blinking light turning to green, which means the transducer connection is now good. If you then go on to check your head unit, it will show the start menu indicating that your Garmin LiveScope troubleshooting was successful.
Garmin LiveScope clarity problems
Is your Garmin LiveScope not clear? While this issue is quite common, it’s usually fairly easy to troubleshoot.
Lure not visible on LiveScope
If you can’t see your jig on LiveScope, this is most often a sonar sensitivity issue, and can be fixed by increasing the sonar gain to its maximum, while adjusting the gain of the image separately until you get the right ratio of signal to noise.
That way you can decide what you want to be able to see, while reducing the background noise to a minimum. Let’s take a look at how to do this below.
How do you get clarity on Livescope?
In order to improve the clarity of your LiveScope image, start by clicking on “Menu” in the bottom right hand corner and then on “Sonar Setup.”
On the next screen, click on “Color Gain” and slide it up to its maximum setting.
Then go back to the previous screen, and click on “Color Scheme” and try several different options until you like the results you see on your screen.
After doing this, you’ll notice that the signals are much stronger than before, but that you also have more background noise as a result of turning up the sonar sensitivity.
In order to reduce the background noise, go back to the main LiveScope screen, click on “Menu,” and then click on “Gain.” On the next screen, reduce the gain to around 60 to 70%, until you’re happy with the results.
Doing this allows you to amplify the sensitivity of the sonar signal to its maximum, while reducing the gain of the image separately, in order to get an ideal balance between signal and noise.
Final remarks
This concludes our article on the most common Garmin LiveScope problems, and how to fix them.
Hopefully this will help you with your Garmin LiveScope troubleshooting, and fix any LiveScope issues that you may experience. Tight lines and see you on the water!