Best Walleye Trolling Setup (5 Things You Need To Know)
UPDATED 03 NOVEMBER 2023
by Robert Ceran
Walleye trolling is among the most productive methods to catch walleye, due to the fact that you can effortlessly cover lots of water with half a dozen or more lines in the water.
And when combined with expert use of a fish finder to locate walleye and the depth at which they are holding, it is by far the most deadly tactic to put a lot of fish in the boat.
But in order to do well with this type of fishing, it’s essential to have the right gear and set it up in the right way for maximum success.
In this article we’ll go over the basics of what gear and setup you need in order to troll for walleye.
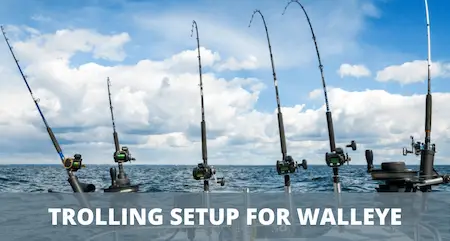
Walleye trolling setup explained
For walleye trolling it’s essential to have the right equipment, and you’ll need to following items in order to get started:
- Trolling rods
- Line counter reels
- 10-15 lb test monofilament line
- Rod holders
- Planer boards
- Lures
- Lure depth chart
These are just the basic items to get you started, and of course there’s a lot more that you can use in addition to these (including bottom bouncers, snap weights, crawler harnesses, lead core lines etc.).
We’re going to discuss the more advanced techniques in other articles, but for now we’ll cover the basics, to help you get out on the water and catch some ‘eyes.
Let’s dive into the details and look at each of these gear items more thoroughly, in order to understand how they fit into the overall walleye trolling setup:
Walleye trolling rod setup
You don’t need to spend a fortune when you buy a walleye trolling rod, but it’s important to get a rod that has enough backbone to handle the weight of big fish, heavy sinkers, and planer boards.
You should look for rods with the following specifications for walleye trolling:
- Rod length: 6’ to 9’ (8 to 8’6” is great to start with)
- Rod power: medium-heavy to medium
- Rod action: moderate
Fiberglass is traditionally the best blank material for a trolling rod, since it has more flexibility than graphite and also comes with more power and durability.
But in recent years, graphite strengthening technology has improved dramatically, and as a result graphite rods are just as strong as their fiberglass counterparts, while weighing much less.
You’ll want to get a rod with lots of backbone, so choose either medium heavy or medium power, and a moderate action taper to give you lots of flexibility along the top half of the rod.
This will help to cushion the strain of planer boards tugging on the rod tip in rough water, and also comes in handy when you have to haul in your planer board with a big fish on the other end of the line.
How long should a walleye trolling rod be?
In terms of length, 8’ to 8’8” is a great length to get you started, but once you’re ready to troll with four or more rods at the same time, you’ll probably want to get a range of longer rods and shorter rods, which will help to spread out your lines without getting them tangled with each other.
The longest rods are used for the outermost lines (usually with planer boards), while the shortest ones are used for the lines going out straight from the back.
If you’re using a planer board with your rod, make sure your rod is at least 8 foot long, to keep the line between the rod and the planer board up in the air, which you can achieve by keeping the rod tip up.
That way you’ll avoid the line dipping into the water, which tends to drag the planer board off course.
Walleye trolling reel setup
For walleye trolling it’s essential to use line counter reels. Line counter reels are round spool baitcasters that have a line counter mechanism attached to the spool, which tells you how much line you’ve released from the spool.
Line counters are important because they allow you to use a lure depth chart, since you can release exactly the right amount of line from your reel in order for your lure to be at the right depth in the water (more on that below).
In addition, if you catch a walleye at a specific depth with a line counter reel, you can then reproduce the same settings with all your other rods to key in on that depth.
In order for the line counter mechanism to work properly, it’s important to fill the spool to capacity with the recommended line strength, and then set the line counter to zero before starting to pull line off the spool.
Do this with all your reels, and that way you can easily transfer settings from one reel to another once you start to catch fish at a specific depth.
Walleye trolling line setup
When trolling for walleye in open water without debris or weeds, 10 lb test monofilament is the best choice.
But if there is a lot of plant growth for your lure to get snagged on (or if there’s a chance of hooking a big northern pike), it’s better to use 15 lb test monofilament instead.
Keep in mind that different line sizes have different dive curves, and factor this in when you calculate the depth settings with your lure depth chart.
Also, a thinner line creates less friction in the water, which makes it easier for your lure to dive deeper.
Planer board setup
Planer boards are very helpful if you want to use more than 2 rods for trolling, as they are designed to pull your line sideways away from the boat, and thereby increase the spread of lines, which helps to avoid entanglement.
Once you’ve pulled the right amount of line off your spool in order for your lure to be at the desired depth, then attach the line to the clip on the side of a planer board, followed by attaching the second clip that’s connected to the indicator flag.
By doing this you may be able to see when you get a bite because the fish will pull down the flag of the planer board. However, this isn’t always the case, and sometimes the flag just wobbles, or the board changes direction.
You can control how far to the side a planer board goes by the amount of line you release, which is useful when you want to stagger multiple planer boards and lines next to each other.
\Also keep in mind that you need both left handed and right handed versions of planer boards for each side of the boat.
Choosing the right lures
When it comes to walleye trolling lures, there’s a huge variety to choose from, which we can’t cover in detail here (but we’re planning to write a separate article just on this topic).
In general, you’ll want to have a range of different crankbaits and stickbaits, which gives you the opportunity to “match the hatch” wherever you’re fishing.
This means taking note of what kinds of bait fish the walleye are feeding on, and then choosing a lure that looks similar in size, shape and color.
For example, if you know the walleye are feeding on smelt, then a Berkley Flicker Shad in the color ‘Blue Smelt’ may be a good choice of lure.
Another rule of thumb is that it’s best to use more natural colored lures in clear water, since the walleyes have more time to look at your lure, while the brighter colored lures are best for stained or cloudy water.
Pro tip: always get two lures of every color and size. That way, if you notice that one particular lure is producing most bites, you can put a second one in the water to maximise your chances of catching more fish.
Lure depth chart
Walleye are most often found suspended at a specific depth range, and it’s important to troll your lure at the same depth, or rather slightly above it, since walleye feed upwards in the water column.
In order to achieve this, you first need to know the depth at which walleye are holding (for which you’ll need a fish finder).
And secondly, you need to adjust the depth at which you troll your lures, which you can achieve by using a lure depth chart that correlates walleye trolling speed with lure fishing depth.
Traditionally this was done by referring to a book called “The Trolling Bible,” which contains information on many lures, but the best way to do this nowadays is to use the “Precision Trolling” smartphone app.
You can use the app to determine the depth of any lure model when trolled at a specific speed and with a specific amount of line out.
That way you can choose exactly the right amount of line to release from your reel in order to present your lure at the right depth.
Walleye trolling for beginners
Once you’ve got your walleye trolling setup put together, you’re ready to get started.
In general, it’s best to go out with a second angler when you’re trolling as that makes it easier to handle multiple rods and planer boards, plus land fish all at the same time.
In the beginning it’s best to start with fewer lines in the water, as that makes it easier to avoid entanglement.
Also, if it’s your first time to fish with planer boards, only use one on each side of the boat.
Keep in mind that if you’re using two planer boards on one side of the boat, and get a bite on the outer one, you need to let the fish pull the board backwards, and then land it at the back of your boat to avoid entanglement with the other lines.
This can be a little tricky to accomplish at first, which is why it’s best to start with fewer lines.
Use your fish finder to locate walleye, and to determine the depth at which they’re holding.
Then refer to the Precision Trolling app to figure out how much line you need to release from your line counter reel in order to troll at that depth, or a few feet above it. If you’ve got several rods, you can test a range of depths at the same time.
After releasing the correct amount of line, clip it onto your planar board, and then release more line, allowing the board to move out to the side to achieve a spread of lines.
Repeat this process with all your lines, and you’re all set and ready to catch fish!