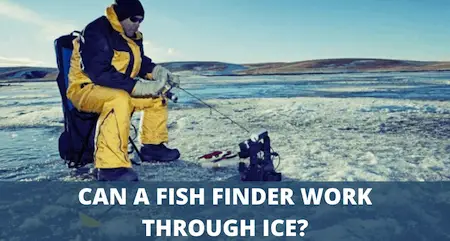
Can A Fish Finder Work Through Ice, And Can You Use A Regular Fish Finder For Ice Fishing?
UPDATED 17 MAY 2023
by Robert Ceran
Here’s the quick answer:
Yes – a fish finder can be used to shoot sonar directly through ice to locate fish in the water.
You just have to make sure that the ice is clear and has a smooth surface, and that there is no air between the transducer and the ice.
You can achieve this by pouring some water onto the ice before placing the transducer on it.
Ice fishing has the advantage that you can reach any part of the lake on foot, while you would need a boat for this in the warm season. But, as most anglers know, fish are often concentrated in some areas, and absent from others.
So, without a way to find the right spots, this would mean drilling lots of test holes to see if you can get a bite, which could take a long time before you get lucky.
A much better way to go about this is to use a fish finder to locate fish before you drill a hole in the ice.
Luckily, this can be easily achieved by using a depth finder to get a reading through the intact ice, which will give you a good idea where the fish are concentrating before you start drilling.
Can you use a regular fish finder for ice fishing?
Absolutely – almost any portable fish finder can be used to shoot sonar through ice, as long as it has a portable power source, and the transducer is set up correctly with a tight fit to the ice.
If you read our article can a fish finder work out of water?, you’ll know that sonar waves can’t travel through air, but they propagate well through some solid substances. Sonar waves actually travel more readily through ice than water, so a transducer can be set up on top of the ice to send and receive sonar pulses as if it were directly in contact with the water.
For more information on how sonar works for detecting fish, take a look at our article on how does a fish finder work?
How do you use a regular fish finder for ice fishing?
In order to shoot sonar through ice, first of all you’ll need a portable depth finder, plus a portable power source. If you’re not sure what battery is best for this purpose, I recommend a 12V 7AH lithium battery, since this is one of the lightest models available (check out our article on the best fish finder battery for more details).
Once you’re ready to set up your gear on the ice, you need to make sure there is a really tight fight between the transducer and the ice. This depends on two main factors:
- Smoothness of the ice
- Absence of air between the transducer and the ice
Start by wiping snow from the surface of the ice. Look for a smooth surface, and make sure there are no air bubbles, cracks, or dirt stuck in the ice. Any imperfections like that can negatively affect the sonar pulses, so look for clear ice.
Next, pour a little water onto the ice, and place your transducer on top of the water. Make sure there is a tight fight between the transducer and the ice, otherwise the signaling won’t work. This works better if you squirt more water on to the ice, to avoid areas with air between the surfaces.
Then turn on the depth finder, and check the reading. This works extremely well if the ice is clear, and you’ll quickly spot fish suspended in the water below, such as a nice school of crappie. If you’re not sure how to detect fish on the display, check out our articles on how to read a fish finder, as well as how to read CHIRP sonar.
However, this approach doesn’t work so well if the ice has a rough, opaque surface, which can happen with old ice towards the end of winter. In that case, try scraping the top layer off, until you get down to clearer ice. You can also look for old fishing holes that have frozen over again, as these usually have smoother ice. Fresh ice is always better than old ice in terms of allowing sonar signals to pass through.
Pro tip: if the fish tend to spook easily where you are, first scope out several good spots with your depth finder. Drill 2-3 holes in any locations where you find fish. Then go back to each of the holes and check if the fish are still there. If yes, start fishing, if no, go on to the next hole.
Can ice fishing damage my fish finder?
The only real risk of damaging your fish finder stems from using water to attach the transducer to the ice, which tends to freeze after a while. This can result in the transducer getting stuck to the ice. If this happens, make sure you remove it very gently. Try to loosen it by scraping the ice away with a knife, or even better, by pouring hot water on to it.
If you think your transducer might have been damaged, and isn’t working as it should, take a look at our article on how to tell if your transducer is bad.
A great way to avoid this is to only shoot through the ice for getting a quick reading. Once you’ve drilled a hole, dip your transducer directly into the water. Or, even better, use your regular fish finder to locate fish through the intact ice, and then switch to using a flasher once you’ve drilled a hole.
Flashers are ideal for ice fishing, since they are specifically designed for this purpose. For more details on this, read our review of the top ice fishing fish finders and flashers.
Conclusion
Since winter days are short, time is of the essence when you’re ice fishing. You don’t want to waste half your day trying to find a good spot. By using a depth finder to locate promising spots before you start drilling holes, you can save time and catch a lot more fish.
In case you’re actively looking into buying a new depth finder, check out our reviews on the Garmin Striker 7SV, as well as the Lowrance Elite 9 TI.